FREE Orthographic Projection Wall Chart
There’s a lot of confusion in our industry when it comes to Orthographic Views.
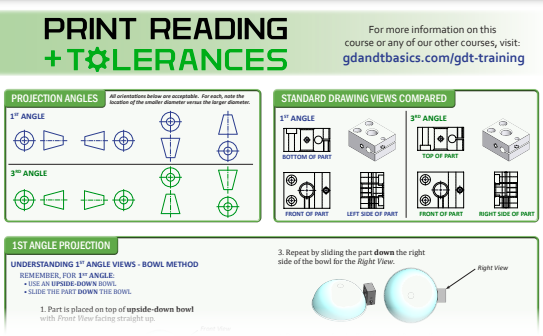
Orthographic views are two-dimensional views of three-dimensional objects. How the views are laid out on a drawing depends on which projection method is being used - First angle projection or Third angle projection. Only one projection method is allowed to be used on any given drawing. A symbol, sometimes referred to as the "plug symbol," is placed on the drawing to identify which of the two methods is being used.
We must always identify which method is used when we are required to interpret a drawing. Not doing so can result in incorrect manufacture, inspection, and ultimately, scrapped parts.
To help you grasp these two projection methods, we have created a reference that is simple to use and easy to understand.
*Sign up below to receive your free wall chart!

Download Your Free Orthographic Projection Chart